Raspberry Piへのコンピュータビジョンの実装
|
Raspberry Piに computer vision のパッケージをインストールして、その性能を検討することにします。Raspberry Pi 3 に関する解説はWeb上にも多数ありますので、ここでは Raspberry Pi 4(model B) を使用することにします。 Raspberry Pi OS(64bit Debian Bullseye) がインストールされていることを前提とします。Raspberry Piの基本的なセットアップは完了しているとします。Raspberry Pi OS(64bit Debian Bullseye)のセットアップの方法についてはRaspberry Pi 活用の基礎をみて下さい。ssh接続及びVNCViewerを用いたデスクトップの表示も可能になっていると想定します。pythonのパッケージ等は Raspberry Pi OS のインストールと同時に同梱されるバージョンをそのまま使用しています。バージョンはPython 3.9.2 です。
このページでは、最初に、Webカメラを用いた映像のキャプチャーの仕方についても説明します。MJPG-streamerというソフトのインストールを合わせて説明します。その次に、OpenCV Python バージョンをインストールして、Webカメラからの映像の画像処理法について説明します。なお、Webカメラの代わりに、PiCameraを用いても同じく正常に作動します。PiCameraでも解像度が低くなりますが同様の結果が得られます。PiCameraを使用するときは、「Raspberry Piの設定」の「インターフェース」で「カメラ」をEnable(有効)に設定しておきます。
その後、OpenCV C++ バージョンをインストールして、C++コードを用いたコンピュータビジョンを実験します。
Last updated: 2022.2.17
Web カメラから動画をストリーミング配信: MJPG-streamer 編 |
Raspberry Pi と、WEBカメラ (PiCamera)があれば、簡単に動画ストリーミングを行うことができます。ソフトウェアとしては、MJPG-streamerを使用します。WEBカメラとして、ここでは、LOGICOOL C310を用いています。
最初に、MJPG-streamerのインストールを行います。ターミナルからssh接続で、Raspberry Piに接続してください。最新のパッケージリストを取得します。以下のコマンドを入力してください。
$ sudo apt-get update
続いて、MJPG-streamer に必要なパッケージである、subversion、libjpeg-dev、imagemagick、をインストールします。以下のコマンドを実行します。
$ sudo apt-get install subversion libjpeg-dev imagemagick
MJPG-streamerのソースファイルの取得とコンパイルを行うために、以下のコマンドを実行します。
$ git clone https://github.com/jacksonliam/mjpg-streamer.git
$ cd mjpg-streamer/mjpg-streamer-experimental
$ make
$ sudo make install
WEBカメラを、Raspberry Pi に接続します。/mjpeg-streamer-experimental/ ディレクトリに移動して、以下のコマンドを実行し、MJPG-streamer を起動します。
$ export LD_LIBRARY_PATH=.
$ ./mjpg_streamer -i "./input_uvc.so -f 10 -r 320x240 -d /dev/video0 -y -n" -o "./output_http.so -w ./www -p 8080"
パラメーターは必要に応じて変更します。
-f : frame rate : ストリーム動画のフレームレート(1秒あたりのフレーム数)を指定します。(例:-f 10)
-r : resolution : ストリーム動画の解像度を指定します。(例: -r 320x240)
ウェブのIPのポート番号が8080となっています。
次回以降も、
$ cd mjpg-streamer/mjpg-streamer-experimental
$ export LD_LIBRARY_PATH=.
$ ./mjpg_streamer -i "./input_uvc.so -f 10 -r 320x240 -d /dev/video0 -y -n" -o "./output_http.so -w ./www -p 8080"
と入力し、mjpg-streamerを立ち上げます。停止は[Ctrl+c]で終了します。
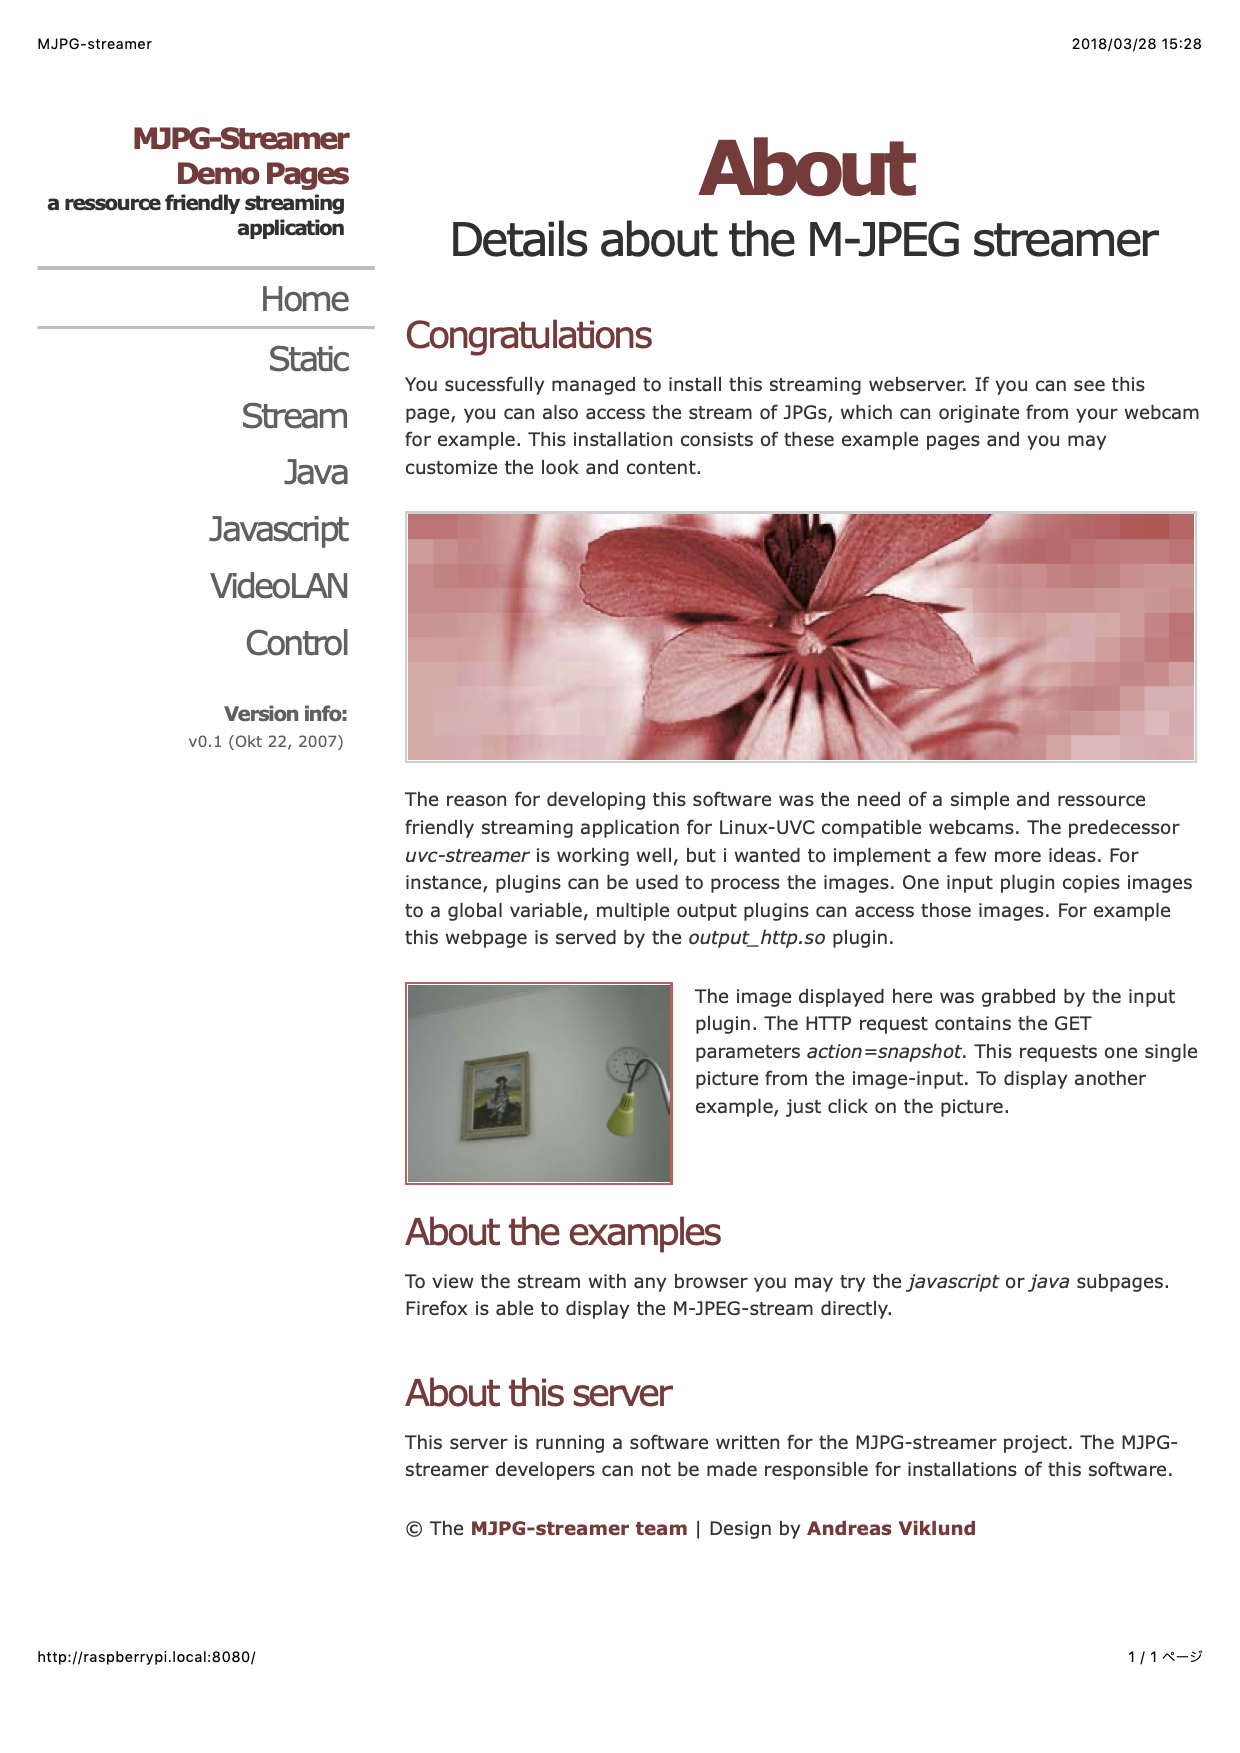
Webブラウザを起動し、Raspberry Pi のポート8080にアクセスすると(http://192.168.xx.xx:8080/) 、以下のようなwebページが表示されます。
この画面上でStreamの項をクリックすると、web cameraの映像が表示されます。
長いコマンド文を毎回入力することは煩雑なので、以下のようなshスクリプトを作成します。
#!/bin/sh
# This is Web-streaming server start up script.for raspi

cd mjpg-streamer/mjpg-streamer-experimental
export LD_LIBRARY_PATH=.
./mjpg_streamer -i "./input_uvc.so -f 15 -r 640x320 -d /dev/video0 -y -n" -o "./output_http.so -w ./www -p 8080"

echo "mjpg_streamer started"
このコードをstream.shという名前で、ホームディレクトリに保存してください。webカメラを使用する前に、
$ sh ./stream.sh
とコマンドを入力すれば、
pi@raspberrypi:~ $ sh ./stream.sh
MJPG Streamer Version: svn rev: 3:172
 i: Using V4L2 device.: /dev/video0
 i: Desired Resolution: 640 x 320
 i: Frames Per Second.: 15
 i: Format............: YUV
 i: JPEG Quality......: 80
i: The format asked unavailable, so the width 640 height 360
 o: www-folder-path...: ./www/
 o: HTTP TCP port.....: 8080
 o: username:password.: disabled
 o: commands..........: enabled
と返ってきます。mjpg-streamerが立ち上がります。PCあるいはスマホのWebブラウザを起動し、Raspberry Pi のポート8080にアクセスすると、mjpg-streamerのwebページが表示されます。終了は[Ctrl+c]です。
Web カメラから動画をストリーミング配信: GStreamer 編 |
現在広く使用されているストリーミング配信のソフトはGStreamerです。ここで、GStreamerを用いた動画配信の例を取り上げます。Q-engineeringのサイトにある解説に沿って、GStreamerを利用する方法を説明します。Raspberry Pi のBusterおよびBullseyeでは、GStreamerはインストールされています。そのチェックをしてみましょう。
$ dpkg -l | grep gstream*

-----
ii gir1.2-gstreamer-1.0:arm64 1.18.4-2.1 arm64 GObject introspection data for the GStreamer library
ii gstreamer1.0-alsa:arm64 1.18.4-2 arm64 GStreamer plugin for ALSA
ii gstreamer1.0-libav:arm64 1.18.4-3 arm64 ffmpeg plugin for GStreamer
ii gstreamer1.0-plugins-bad:arm64 1.18.4-3 arm64 GStreamer plugins from the "bad" set
ii gstreamer1.0-plugins-base:arm64 1.18.4-2 arm64 GStreamer plugins from the "base" set
ii gstreamer1.0-plugins-good:arm64 1.18.4-2+~rpt1 arm64 GStreamer plugins from the "good" set
ii gstreamer1.0-x:arm64 1.18.4-2 arm64 GStreamer plugins for X11 and Pango
ii libgstreamer-gl1.0-0:arm64 1.18.4-2 arm64 GStreamer GL libraries
ii libgstreamer-plugins-bad1.0-0:arm64 1.18.4-3 arm64 GStreamer libraries from the "bad" set
ii libgstreamer-plugins-base1.0-0:arm64 1.18.4-2 arm64 GStreamer libraries from the "base" set
ii libgstreamer1.0-0:arm64 1.18.4-2.1 arm64 Core GStreamer libraries and elements
のようになります。ライブ動画を配信するためには、以下のようにプラグインを追加する必要があります。
# install a missing dependency
$ sudo apt-get install libx264-dev libjpeg-dev

# install the remaining plugins
$ sudo apt-get install libgstreamer1.0-dev \
libgstreamer-plugins-base1.0-dev \
libgstreamer-plugins-bad1.0-dev \
gstreamer1.0-plugins-ugly \
gstreamer1.0-tools \
gstreamer1.0-gl \
gstreamer1.0-gtk3

# if you have Qt5 install this plugin
$ sudo apt-get install gstreamer1.0-qt5

# install if you want to work with audio
$ sudo apt-get install gstreamer1.0-pulseaudio
先に進む前に、インストールのチェックしておきます。
$ gst-launch-1.0 --version
$ gst-launch-1.0 videotestsrc ! videoconvert ! autovideosink
$ gst-launch-1.0 v4l2src device=/dev/video0
映像用のウインドウがポップアップします。OSがBusterとBullseyeでは、カメラソースの記述が若干異なります。Bullseyeでは、device=/dev/video0の代わりに、libcamerasrcと記述します。Web camからの映像を表示させるためには、以下のようにコマンドを打ちます。
$ gst-launch-1.0 libcamerasrc ! video/x-raw, width=640, height=480, framerate=30/1 ! videoconvert ! videoscale !
clockoverlay time-format="%D %H:%M:%S" ! autovideosink
ストリーミング配信のプロトコルには、UDP、TCPもありますが、ここでは、RTSP (Real-Time Streaming Protocol)を利用します。ここで使用するRTSPストリーミングは広く普及しています。エンドポイント間のメディア・ストリーミング・セッションを制御するように設計されています。TCPとUDPの単一クライアント接続とは対照的に、RTSPは単一サーバーを複数のクライアントに接続できます。実際には、クライアントの数はRaspberryPiの帯域幅容量によって制限されます。RTSPのストリーミングを開始する前に、gst-rtsp-serverが必要です。以下のようにインストールします。
$ cd ~
# install the rtsp server version 1.18.4
$ wget https://gstreamer.freedesktop.org/src/gst-rtsp-server/gst-rtsp-server-1.18.4.tar.xz
$ tar -xf gst-rtsp-server-1.18.4.tar.xz
$ cd gst-rtsp-server-1.18.4

# make an installation folder
$ mkdir build && cd build

# run meson
$ meson --prefix=/usr \
--wrap-mode=nofallback \
-D buildtype=release \
-D package-origin=https://gstreamer.freedesktop.org/src/gstreamer/ \
-D package-name="GStreamer 1.18.4 BLFS" ..
$ ninja -j4

# install the libraries
$ sudo ninja install
$ sudo ldconfig
mesaがインストールされていないときは、$ sudo apt install mesa とダウンロードして下さい.
RTSPによるストリーミングを実行するために、以下のコマンドを打ちます。
# select the proper folder
$ cd ~/gst-rtsp-server-1.18.4/build/examples

# run the pipeline
$ ./test-launch "libcamerasrc ! image/jpeg, width=640, height=480, framerate=30/1 ! jpegparse ! rtpjpegpay name=pay0
pt=96"
RTSPでは、パイプラインは、ソースがraspicamのようなx-h264形式に対応していることを前提としています。そうでない場合は、フォーマットを変換する必要があります。x-h264で送ると、VLCで受信できませんので、jpeg形式にします。
stream ready at rtsp://127.0.0.1:8554/test

[4:22:37.635962258] [10082] INFO Camera camera_manager.cpp:293 libcamera v0.0.0+3544-22656360
[4:22:37.819129448] [10084] INFO Camera camera.cpp:1029 configuring streams: (0) 640x480-MJPEG
このような表示が出て、ストリーミングが開始されます。rtspのアドレスが表示されます。 しかし、表示されたアドレスを入力しても何も取得することができません。「127.0.0.1」の部分をRaspiのIPアドレス 「rtsp://192.168.xx.xx:8554/test」に置き換えてアクセスしてください。
受信にはVLCメディアプレイヤを使用します。VLCをインストールしていないときは、公式サイトからダウンロードして下さい。VLCを起動して、「ファイル」、「ネットワークを開く」をクリックします。URLに「rtsp://{RaspiのIPアドレス}:8554/test」と記入します。プレイをクリックすればRTSPのストリーミングを受信できます。
Webカメラからの映像をOpenCVで画像処理する:Python 編 |
OpenCVをインストールしましょう。WebカメラをPCのusbコネクターに接続してください。webカメラの代わりにPiCameraを使用しても正常に作動します。
PCのターミナルからラズパイにssh接続してください。または、VNC接続でラズパイのデスクトップのターミナルから、以下のようなコマンドを入力します。
$ sudo apt-get update
$ sudo apt-get install python3-opencv
終了するまでに、数分かかります。
以下のpythonコードを作成して、video.pyという名前で保存してください。
#!/usr/bin/env python

import cv2

s_video = cv2.VideoCapture(0)

while True:
  ret, img = s_video.read()
  cv2.imshow("Stream Video",img)
  key = cv2.waitKey(1) & 0xff
  if key == ord('q'): break

# When everything done, release the capture
cap.release()
cv2.destroyAllWindows()
保存するディレクトリはopencvという名称にしましょう。
Webカメラからの映像をOpenCVを使って、ラズパイのデスクトップに表示しましょう。VNC Viewerを起動して、ラズパイに接続してください。ラズパイのデスクトップが表示されたら、ターミナルを起動します。ターミナルで、
$ cd opencv
$ python3 video.py
と入力します。リモートPCから操作するとき、「XCB error: 148 (Unknown)」という表示が出ますが、無視して下さい。これはRaspberry Pi のデスクトップにGUIウインドウを表示できないことに起因します。以下のような映像が表示されます。
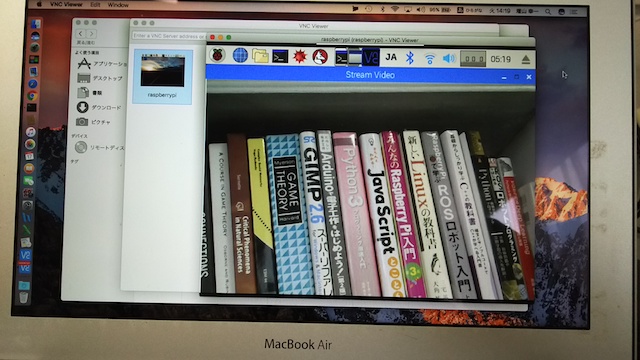
映像の表示を終了するときは、画像上で[q]キーあるいはターミナルで[Ctrl+c]を入力します。
Webカメラからの映像に対するOpenCVを用いた画像処理の手続きは、PythonをインストールしたPCでの処理方法と同じです。具体的な内容については、 OpenCVで画像処理のページ を読んでください。
以下のコードをpythonスクリプトとして保存してください。Webカメラからの映像をキャプチャーして、保存を行います。
import numpy as np
import cv2

cap = cv2.VideoCapture(0)

# Define the codec and create VideoWriter object
fourcc = cv2.VideoWriter_fourcc(*'XVID')
out = cv2.VideoWriter('output.avi',fourcc, 20.0, (640,480))

while(cap.isOpened()):
    ret, frame = cap.read()
    if ret==True:
        frame = cv2.flip(frame,1)

        # write the flipped frame
        out.write(frame)

        cv2.imshow('frame',frame)
        if cv2.waitKey(1) & 0xFF == ord('q'): # qキーで終了
            break
    else:
        break

# Release everything if job is finished
cap.release()
out.release()
cv2.destroyAllWindows()
fourcc = cv2.VideoWriter_fourcc(*'XVID')の代わりに、fourcc = cv2.VideoWriter_fourcc(*'MJPG')とすると容量が大きくなります。
顔認識をするプログラムは以下のように作成できます。まず、学習済のHaar-like特徴を用いた分類器のデータ(xmlファイル)をインストールします。xmlファイルの場所がわからない場合は、以下のGitHubのレポジトリ「https://github.com/opencv/opencv」をダウンロードしてください。
$ git clone https://github.com/opencv/opencv.git
$ git clone https://github.com/opencv/opencv_extra.git
ここでは、C++のビルドはせずに、opencv/data/ディレクトリに配置されているPythonのサンプルスクリプトを利用します。この中のディレクトリhaarcascades/にある、
正面の顔検出用: haarcascade_frontalface_default.xml、及び
瞳検出用: haarcascade_eye.xml
笑顔検出用: haarcascade_smile.xml
を利用します。顔検出用のPythonスクリプトを作成します。以下のコードをdetect.pyという名前で作成します。
import numpy as np
import cv2

face_cascade_path = "opencv/data/haarcascades/haarcascade_frontalface_default.xml"
eye_cascade_path = "opencv/data/opencv/haarcascades/haarcascade_eye.xml"

face_cascade = cv2.CascadeClassifier(face_cascade_path)
eye_cascade = cv2.CascadeClassifier(eye_cascade_path)

image = cv2.imread('faces.jpg')
color = (255,0,0)
gray = cv2.cvtColor(image, cv2.COLOR_BGR2GRAY)

cascade = cv2.CascadeClassifier(face_cascade_path)
facerect = cascade.detectMultiScale(gray, scaleFactor=1.3,
                      minNeighbors =1,minSize=(1,1))
if len(facerect) > 0:
    for rect in facerect:
        cv2.rectangle(image, tuple(rect[0:2]),tuple(rect[0:2]+rect[2:4]),color,thickness=2)
else:
    print("no face")

cv2.imshow("detected.jpg",image)

cv2.waitKey()
cv2.destroyAllWindows()
'faces.jpg'はopencvに保存されている画像です。detect.pyを実行します。
$ cd opencv
$ python3 detect.py
顔にブルー枠のついた画像が表示されます。このスクリプトでは、目に窓枠をつける部分を省略していますので、目に枠は付いていません。終了するときは、画像上 で右上のxをクッリクするか、ターミナルで[Ctrl+c]を入力してください。画像のサイズによって画像表示が大きすぎて、全体像が見ないかもしれませんが、その時は画像をスクロールして見てください。
Webカメラからの映像をキャプチャして、人物の顔や目を検出するプログラムを書いてみましょう。以下のコードを作成してください。
import numpy as np
import cv2


cap = cv2.VideoCapture(0)
if cap.isOpened() is False:
  raise IOError

face_cascade_path = "opencv/data/haarcascades/haarcascade_frontalface_default.xml"
eye_cascade_path = "opencv/data/haarcascades/haarcascade_eye.xml"

face_cascade = cv2.CascadeClassifier(face_cascade_path)
eye_cascade = cv2.CascadeClassifier(eye_cascade_path)


while True:
  ret, img = cap.read()
  gray = cv2.cvtColor(img, cv2.COLOR_BGR2GRAY)
  faces = face_cascade.detectMultiScale(gray, 1.5, 5)
  for (x,y,w,h) in faces:
    cv2.rectangle(img,(x,y),(x+w,y+h),(255,0,0),2)
    roi_gray = gray[y:y+h, x:x+w]
    roi_color = img[y:y+h, x:x+w]
    eyes = eye_cascade.detectMultiScale(roi_gray)
    for (ex,ey,ew,eh) in eyes:
      cv2.rectangle(roi_color,(ex,ey),(ex+ew,ey+eh),(0,255,0),2)
  cv2.imshow('video image', img)
  key = cv2.waitKey(10)if key == 27:  # {CTRL+C}キーで終了
    break

cap.release()
cv2.destroyAllWindows()
このコードを実行すると、カメラからの映像表示に、ブルーの顔枠が書き込まれます。さらに、グリーンの目の枠を表示します。検出の結果表示と映像の動きには若干のタイムラグが起こります。鼻などもグリーンの枠で囲われるので、精度はあまり高くありません。
OpenCV DNN モジュールの活用 |
OpenCVのGithub repo: https://github.com/opencv/opencv.gitがダウンロードしてあると想定します。
OpenCVにおけるDeep Neural Networks (dnn module)の大まかな解説はTutorialsの目次をみて下さい。このtutorial_dnn_googlenet(C++)の解説はとてもわかりにくいので、理解しやすい解説を提供しているDeep Learning with OpenCV DNN Module: A Definitive GuideというLearnOpenCVのサイトを参考にします。
OpenCV DNNモジュールは、多くの一般的なディープラーニングフレームワークをサポートしています。以下は、OpenCV DNNモジュールがサポートするディープラーニングフレームワークです。
Caffe
OpenCV DNNで事前にトレーニングされたCaffeモデルを使用するには、2つのファイルが必要です。
1つは、事前にトレーニングされた重みを含むmodel.caffemodelファイルです。もう1つは、拡張子が.prototxtのモデルアーキテクチャファイルです。これは、すべてのニューラルネットワークレイヤーの定義を含むJSONのような構造を持つプレーンテキストファイルのようなものです。
TensorFlow
事前にトレーニングされたTensorFlowモデルを読み込むには、2つのファイルが必要です。モデルの重みファイルとprotobufテキストファイルです。重みファイルの拡張子は.pbで、事前にトレーニングされたすべてのウェイトを含むprotobuf形式のファイルです。モデル構成は、.pbtxtファイル拡張子を持つprotobufテキストファイルに保持されます。
TorchとPyTorch
Torchモデルファイルをロードするには、事前にトレーニングされたウェイトを含むファイルが必要です。通常、このファイルの拡張子は.t7または.netです。PyTorchの学習済みモデルでは、拡張子が.pth、または、.ptのファイルになっているので、これをONNX形式に変換するのが最善の方法です。ONNXに変換した後、ONNXモデルを読み込みます。
Darknet
OpenCV DNNモジュールは、有名なDarknetフレームワークもサポートしています。 Darknetフレームワークで公式のYOLOモデルを使用している場合が該当します。通常、Darknetモデルをロードするには、Caffeと同様に、モデルを記述した2種類のファイルが必要です。拡張子が.weightsの重みファイルと、ネットワーク構成ファイルである.cfgファイルの二つが必要です。
また、モデルの学習で用いられた画像データの分類を記述したクラスファイルが必要です。画像識別では、ILSVRC2012 classesによる分類が使用され、物体検出では、MS COCOやPascal VOCが採用されています。詳しくは、 公式サイトのwikiも参考になります。
Tensorflowの学習済みモデルを利用したOpenCVの活用について、公式サイトのDeep Neural Networks (dnn module)のwikiに沿って説明します。このチュートリアルでは、TensorFlow(TF)分類モデルの凍結グラフを用いた物体検出の実行手順を説明しています。ただし、Tensorflowのコードがtensorflow 1.x の仕様になっていますので、tensorflow 2.xで実行するとエラーが出ます。
Tensorflowの学習済みモデルのダウンロード先は上記のDeep Neural Networks (dnn module)のwikiのページに記述されています。このサイトからダウンロードしたファイルを解凍して、その中の「frozen_inference_graph.pb」をmodels/ディレクトリに配置します。ssd_mobilenet_v2_coco_2018_03_29.pbtxtをダウンロードします。'ssd_mobilenet_v2_coco_2018_03_29.pbtxt'ファイルをmodels/ディレクトリに配置し、さらに、任意の画像sample.jpgをimages/ディレクトリ配置します。
次に、以下のpythonスクリプトを作成して、opencv_dnn.pyとして保存して下さい。
import cv2 as cv

cvNet = cv.dnn.readNetFromTensorflow('models/frozen_inference_graph.pb', 'models/ssd_mobilenet_v2_coco_2018_03_29.pbtxt')

img = cv.imread('images/dog.jpg')
rows = img.shape[0]
cols = img.shape[1]
cvNet.setInput(cv.dnn.blobFromImage(img, size=(300, 300), swapRB=True, crop=False))
cvOut = cvNet.forward()

for detection in cvOut[0,0,:,:]:
    score = float(detection[2])
    if score > 0.3:
        left = detection[3] * cols
        top = detection[4] * rows
        right = detection[5] * cols
        bottom = detection[6] * rows
        cv.rectangle(img, (int(left), int(top)), (int(right), int(bottom)), (23, 230, 210), thickness=2)

cv.imshow('img', img)
cv.waitKey()
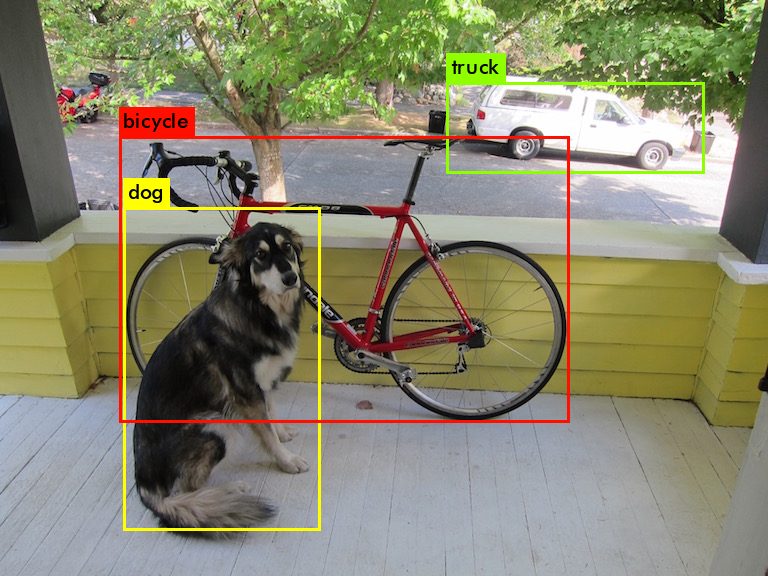
このファイルを引数なしで実行すると、検出された物体に枠がついた画像が表示されます。このスクリプトでは物体名が表示されていないので、物体名を表示させます。以下のスクリプトを作成して下さい。detect_img.py というファイル名で保存して下さい。
import cv2
import numpy as np

# load the COCO class names
with open('models/object_detection_classes_coco.txt', 'r') as f:
    class_names = f.read().split('\n')

# get a different color array for each of the classes
COLORS = np.random.uniform(0, 255, size=(len(class_names), 3))

# load the DNN model
model = cv2.dnn.readNet('models/frozen_inference_graph.pb', 'models/ssd_mobilenet_v2_coco_2018_03_29.pbtxt','tensorflow')

# read the image from disk
image = cv2.imread('images/dog.jpg')
image_height, image_width, _ = image.shape
# create blob from image
blob = cv2.dnn.blobFromImage(image=image, size=(300, 300), crop=False,
                             swapRB=True)
# create blob from image
model.setInput(blob)
# forward pass through the model to carry out the detection
output = model.forward()

# loop over each of the detection
for detection in output[0,0]:
    # extract the confidence of the detection
    confidence = detection[2]
    # draw bounding boxes only if the detection confidence is above...
    # ... a certain threshold, else skip
    if confidence > .6:
        # get the class id
        class_id = detection[1]
        # map the class id to the class
        class_name = class_names[int(class_id)-1]
        color = COLORS[int(class_id)]
        # get the bounding box coordinates
        box_x = detection[3] * image_width
        box_y = detection[4] * image_height
        # get the bounding box width and height
        box_width = detection[5] * image_width
        box_height = detection[6] * image_height
        # draw a rectangle around each detected object
        cv2.rectangle(image, (int(box_x), int(box_y)), (int(box_width), int(box_height)), color, thickness=2)
        # put the FPS text on top of the frame
        cv2.putText(image, class_name, (int(box_x), int(box_y - 5)), cv2.FONT_HERSHEY_SIMPLEX, 1, color, 2)

cv2.imshow('image', image)
cv2.imwrite('image_result.jpg', image)
cv2.waitKey(0)
cv2.destroyAllWindows()
物体検出のためのクラス分類はcoco分類を使用するので、object_detection_classes_coco.txtファイルを用意します。このクラス分類ファイルをmodels/ディレクトリに配置します。object_detection_classes_coco.txtファイルは、OpenCVのgithubサイトの https://github.com/opencv/opencv/の中の、samples/data/dnn/にあります。
ファイル構成の構造は以下の通りです。
.
├── detect_cam.py
├── detect_img.py
├── images
│   ├── dog.jpg
│   ├── output.jpg
│   └── street.jpg
├── models
│   ├── frozen_inference_graph.pb
│   ├── object_detection_classes_coco.txt
│   └── ssd_mobilenet_v2_coco_2018_03_29.pbtxt
├── opencv_dnn.py
└── tf_object_detection.py
このpythonコードを実行すると物体名が表示されます。物体の名称はCOCOのデータ分類の90種類です。
webcamからのライブ映像での物体検出を行うときは、以下のスクリプトを作成して、opencv_cam.pyとして保存して下さい。
import cv2
import time
import numpy as np

# load the COCO class names
with open('models/object_detection_classes_coco.txt', 'r') as f:
    class_names = f.read().split('\n')

# get a different color array for each of the classes
COLORS = np.random.uniform(0, 255, size=(len(class_names), 3))

# load the DNN model
model = cv2.dnn.readNet('models/frozen_inference_graph.pb','models/ssd_mobilenet_v2_coco_2018_03_29.pbtxt', 'tensorflow')

# capture the video
cap = cv2.VideoCapture(0)
# get the video frames' width and height for proper saving of videos
frame_width = int(cap.get(3))
frame_height = int(cap.get(4))

# detect objects in each frame of the video
while cap.isOpened():
    ret, frame = cap.read()
    if ret:
        image = frame
        image_height, image_width, _ = image.shape
        # create blob from image
        blob = cv2.dnn.blobFromImage(image=image, size=(300, 300), mean=(104, 117, 123),
                                     swapRB=True)
        # start time to calculate FPS
        start = time.time()
        model.setInput(blob)
        output = model.forward()
        # end time after detection
        end = time.time()
        # calculate the FPS for current frame detection
        fps = 1 / (end-start)
        # loop over each of the detections
        for detection in output[0, 0, :, :]:
            # extract the confidence of the detection
            confidence = detection[2]
            # draw bounding boxes only if the detection confidence is above...
            # ... a certain threshold, else skip
            if confidence > .4:
                # get the class id
                class_id = detection[1]
                # map the class id to the class
                class_name = class_names[int(class_id)-1]
                color = COLORS[int(class_id)]
                # get the bounding box coordinates
                box_x = detection[3] * image_width
                box_y = detection[4] * image_height
                # get the bounding box width and height
                box_width = detection[5] * image_width
                box_height = detection[6] * image_height
                # draw a rectangle around each detected object
                cv2.rectangle(image, (int(box_x), int(box_y)), (int(box_width), int(box_height)), color, thickness=2)
                # put the class name text on the detected object
                cv2.putText(image, class_name, (int(box_x), int(box_y - 5)), cv2.FONT_HERSHEY_SIMPLEX, 1, color, 2)
                # put the FPS text on top of the frame
                cv2.putText(image, f"{fps:.2f} FPS", (20, 30), cv2.FONT_HERSHEY_SIMPLEX, 1, (0, 255, 0), 2)

        cv2.imshow('image', image)
        if cv2.waitKey(10) & 0xFF == ord('q'):
            break
    else:
        break

cap.release()
cv2.destroyAllWindows()
$ python opencv_cam.py
と実行すると、webcamからのライブ映像の物体検出の動画がポップアップします。推論スピードFPSは約3.3前後です。
公式ページのtutorialsで提供されているpythonコードを利用するケースについて説明します。OpenCVのgithubサイトの https://github.com/opencv/opencv/ をインストールしていないときは、以下のコマンドでダウンロードして下さい。
$ git clone https://github.com/opencv/opencv.git
opencv/samples/dnn/の中に配置されている329行のpythonスクリプトで、object_detection.pyというファイルを使用します。opencv/samples/dnn/ディレクトリ内に、上の例で使用した学習済みモデルの frozen_infrence_graph.pb と ssd_mobilenet_v2_coco_2018_03_29.pbtxt を配置します。さらに、使用する画像sample.jpgを配置します。
$ cd opencv/samples/dnn
$ python object_detection.py --model frozen_inference_graph.pb --config ssd_mobilenet_v2_coco_2018_03_29.pbtxt --input sample.jpg --width 300 --height 300 --classes ../data/dnn/object_detection_classes_coco.txt
と実行します。画像sample.jpg(ここでは、dog.jpg)は自身で用意して、実行するディレクトリに配置して下さい。検出枠の色が異なりますが、下の画像のようなポップアップ表示が出ます。物体名が小さくて読めません。
Webcamからのライブ映像で物体検出を行う場合は、--input オプションを使用せずに、
$ python object_detection.py --model frozen_inference_graph.pb --config ssd_mobilenet_v2_coco_2018_03_29.pbtxt --width 300 --height 300 --classes ../data/dnn/object_detection_classes_coco.txt
と入力します。
OpenCV C++ バージョンのインストール |
OpenCV C++ バージョンをインストールします。最初に、必要なモジュールをインストールします。
# check for updates
$ sudo apt-get update
$ sudo apt-get upgrade

# general tools (35.8 MB)
$ sudo apt-get install build-essential cmake git pkg-config

# if you want to get OpenCV working in python or python3 (208 MB)
$ sudo apt-get install python3-dev python3-numpy

# image formats (0.9 MB)
$ sudo apt-get install libjpeg-dev libpng-dev

# video formats (32.1 MB)
$ sudo apt-get install libavcodec-dev libavformat-dev
$ sudo apt-get install libswscale-dev libdc1394-22-dev

# video back engine (0.6 MB)
$ sudo apt-get install libv4l-dev v4l-utils

# the GTK+2 GUI (175 MB)
$ sudo apt-get install libgtk2.0-dev libcanberra-gtk* libgtk-3-dev

# other dependencies
$ sudo apt-get install libtbb2 libtbb-dev
$ sudo apt-get install libxvidcore-dev libx264-dev
$ sudo apt-get install libopenblas-dev libatlas-base-dev libblas-dev
$ sudo apt-get install liblapack-dev gfortran libhdf5-dev
$ sudo apt-get install libprotobuf-dev libgoogle-glog-dev libgflags-dev
$ sudo apt-get install protobuf-compiler
続いて、OpenCV をGitHub からダウンロードします。ダウンロードしたパッケージに対するプロジェクトファイルを生成します。
# download OpenCV (you get always the latest version)
# 280 MB, which will be removed later
$ cd ~
$ git clone --depth=1 https://github.com/opencv/opencv.git
$ cd opencv
$ mkdir build
$ cd build
$ cmake  ..
以下のような表示が出て cmake は終了します。
ーー中略ーー
--   Python 3:
--     Interpreter:                 /usr/bin/python3 (ver 3.9.2)
--     Libraries:                   /usr/lib/aarch64-linux-gnu/libpython3.9.so (ver 3.9.2)
--     numpy:                       /home/pi/.local/lib/python3.9/site-packages/numpy/core/include (ver 1.22.1)
--     install path:                lib/python3.9/site-packages/cv2/python-3.9
--
--   Python (for build):            /usr/bin/python3
--
--   Java:
--     ant:                         NO
--     JNI:                         /usr/lib/jvm/java-11-openjdk-arm64/include /usr/lib/jvm/java-11-openjdk-arm64/include/linux /usr/lib/jvm/java-11-openjdk-arm64/include
--     Java wrappers:               NO
--     Java tests:                  NO
--
--   Install to:                    /usr/local
-- -----------------------------------------------------------------
--
-- Configuring done
-- Generating done
-- Build files have been written to: /home/pi/opencv/build
「Configuring done」「Generating done」となっていますので、次に、cmake でプロジェクトのビルドをして OpenCV モジュールをインストールします。ビルドに3時間以上かかります。
$ cmake --build .
$ make -j4
$ sudo make install
$ sudo ldconfig
$ sudo apt-get update
インストールに使用したファイルを削除します。約600 MBのサイズが節約できます。
# delete the OpenCV folder with all its temporary files
# it will give you back 600 MB of disk space
$ cd ~
$ sudo rm -rf opencv
OpenCV は/usr/local directory にインストールされます。
/usr/local/bin - executable files
/usr/local/lib - libraries (.so)
/usr/local/cmake/opencv4 - cmake package
/usr/local/include/opencv4 - headers
/usr/local/share/opencv4 - other files
となっています。
OpenCV のインストールチェックをしましょう。以下のC++スクリプトを作成します。
opencv_test.cpp と名前をつけて保存し、画像(ここでは「grace_hopper.bmp」ですが、使用する画像名)を同じディレクトリに配置します。その後、以下のコマンドを入力してビルドします。
$ g++ opencv_test.cpp -o opencv_test `pkg-config --cflags --libs opencv4`
画像が表示できれば成功です。
次に、動画及び Webcamera からの映像の取り込み方法について説明します。以下のコードを作成して下さい。
//camera.cpp #includeint main(int argh, char* argv[]) { cv::VideoCapture cap(0); if(!cap.isOpened()) { return 0; } cv::Mat frame; //取得したフレーム while(cap.read(frame))//無限ループ { cv::imshow("webcam", frame); const int key = cv::waitKey(1); if(key == 'q') { break; } } cv::destroyAllWindows(); return 0; }
このコードをコンパイルします。
$ g++ -o webcam camera.cpp `pkg-config --cflags --libs opencv4`
Wecamera からの映像がリアルタイムでウインドウに表示されます。
最後に、OpenCVのカスケード分類器を利用して、カメラに映る人の顔をリアルタイムで認識するコードを作成します。/usr/local/share/opencv4/haarcascades にあるライブラリを使用します。このwebサイトのコードを改変しました。
以下のコマンドでコンパイルして、顔認証を実行して下さい。
$ g++ -o face_cascade face_cascade.cpp `pkg-config --cflags --libs opencv4` -lopencv_objdetect

$ ./face_cascade
Raspberry Pi のデスクトップ画面にウインドウがポップアップして、リアルタイム映像に映る人物の顔枠が表示されます。ビルドが成功するためには、g++ コマンドのオプションに「 -lopencv_objdetect 」を追加しないとエラーが出ます。理由は分かりませんが、このオプションの追加によりエラーは出なくなりました。
Detectron2を用いた物体検出 |
Detectron2をインストールします。Detectron2のライブラリを Detetron2 のGit Repからダウンロードします。INSTALL.mdの手順に沿ってインストールします。Python 、 Pytorch 、OpenCV などはインストール済みとします。まず、detectron2 をインストールします。
$ git clone https://github.com/facebookresearch/detectron2.git

$ python3 -m pip install -e detectron2
以上で、Detectron2 にあるpython スクリプトは実行可能になります。Model ZOOにある学習済みモデルの一つ、mask_rcnn_R_50_FPN_3x.yaml を用いた物体検出を試みます。
YOLOで使用される画像dog.jpgを用いて、物体検出を行います。画像dog.jpgをディレクトリ/detectron2/demo/にコピぺして下さい。画像はcocoクラスで検出できれば任意のもので結構です。以下のコマンドを打って下さい。検出された画像がディレクトリdemoにoutput.png として保存されます。
detectron2 $ python3 demo/demo.py --config-file configs/COCO-InstanceSegmentation/mask_rcnn_R_50_FPN_3x.yaml \
--input demo/dog.jpg --output demo/output \
--opts MODEL.DEVICE cpu MODEL.WEIGHTS detectron2://COCO-InstanceSegmentation/mask_rcnn_R_50_FPN_3x/137849600/model_final_f10217.pkl
以下のように検出物体のセグメンテーションされた画像が作成されます。残念ながら、自転車のセグメンテーションが二つに分割されています。

Detectron2 のDetectron2 Model Zoo and Baselinesから種々の学習済みモデルがダウンロードできます。例えば、
R50-FPN-1xをダウンロードしたときは
detectron2 $ python3 demo/demo.py --config-file configs/COCO-InstanceSegmentation/mask_rcnn_R_50_FPN_1x.yaml \
--input demo/dog.jpg --output demo/output \
--opts MODEL.DEVICE cpu MODEL.WEIGHTS model_final_a54504.pkl

R50-FPN-3xのケースでは、
detectron2 $ python3 demo/demo.py --config-file configs/COCO-InstanceSegmentation/mask_rcnn_R_50_FPN_3x.yaml \
--input demo/dog.jpg --output demo/dog_output \
--opts MODEL.DEVICE cpu MODEL.WEIGHTS model_final_f10217.pkl
とします。モデルの学習率が異なるR50-FPN-1xとR50-FPN-3xの結果を比べると、検出精度は同じようなものです。
Detectron2 は基本的にGPUを用いることを想定していますので、CPUを用いたときの処理速度は遅くなります。Webcameraのライブ映像から物体検出を行うときは
detectron2 $ python demo/demo.py --config-file configs/COCO-InstanceSegmentation/mask_rcnn_R_50_FPN_3x.yaml \
  --webcam --opts MODEL.DEVICE cpu MODEL.WEIGHTS model_final_f10217.pkl
と入力します。 OpenCVの映像に検出が表示されます。YOLOに比較すると、処理速度は相当に遅いです。GPUが必須です。
同様に、Faster R-CNN を用いた物体検出を行うときは、当該学習済みモデルをダウンロードして、configs/COCO-Detection/以下のyamlファイルを指定します。例えば、
detectron2 $ python demo/demo.py --config-file configs/COCO-DETECTION/faster_rcnn_R_50_FPN_3x.yaml \
--input demo/dog.jpg --output demo/output \
--opts MODEL.DEVICE cpu MODEL.WEIGHTS model_final_280758.pkl
セグメンテーションなしの通常の物体検出だけが行われます。